Thursday, May 2, 2013

March Break

I regretfully did not post about our trip after Christmas.
Long story-- short! The weather was awful, Pennyslvania does not believe in snow plows, and we had a sick little boy.
So, we cut it short. Our destination was Myrtle Beach, SC. We made it to Erie, PA.
Carson and I were both sick. We found out the day after we returned, that he had an ear infection. Poor thing!
The Frog Pond Family Fun Hot TubWithout going into great detail, we were stuck at a truck stop overnight, and it was freezing. We woke up the next morning and headed back North.We stopped at the next big town, Erie, and checked into a hotel!
We went to Splash Lagoon. It was fun, but the next morning we headed for home (and a doctor).


So, that meant that we had to plan BIG for March Break. 

Fort Wilderness!


I'm posting this quite after the fact, so I will spare you the boring details-- here are some photos!


First rest stop in PA.


Coolant leak in GA!


All in all-- an amazing tour! We love, love, love our BUS!
|Stay tuned for a schedule of summer trips!


Sunday, February 24, 2013

Another name for a Toad!

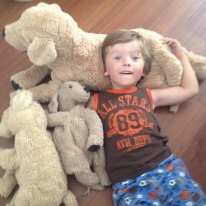
As some of you might know, I call our son Carson, "Toad". Always have.


Well, in the RV world, your "toad" is the vehicle that is being "towed".

When we bought the bus, I never thought about how we were going to get around once it was parked. Last summer, we had a trailer. We would unhitch it, and use the truck to drive wherever we went.

When we ventured out at Christmas, we figured we would make due without a car. However, know that we have had the extra time to prepare (and research), we figured we needed a Toad.

My husband started looking. We had a few criterion. One, had to be light, Two, had to be somewhat "fun", and Three, it had to be affordable. What that means is, after all of our investments in the bus and maintenance, we didn't want to spend even more money on the Toad. Plus, being towed all the time meant a good chance of rock chips, etc.

Adam's family had a motorhome and had a few different Toads, so we had an idea of what type of vehicle would be good. We started looking on kijiji. We also found a few Toads that had the towing part attached (a plus), but nothing that was in decent shape, local and for a decent price.

Then, one day Adam found one. He called me and we went up right after work. It's perfect.

Ok, it's far from perfect. It is a Tracker. It has a hard top.

It needed new brakes, a rear taillight. And a paintjob.

Thankfully, Adam can do all of that, and he likes working away at it, when he has time. The Tracker looked like this:


And now, it looks like this:


So obviously, it is a work in progress!

However, it will be painted "Wild Raspberry", which is a close match to the bus. (Might as well match if we were re-painting it anyway).

I will post more photos. Adam has about 12 days to get it done. I am also interested in seeing how it hooks up to be towed by the bus.

Can't wait!

Saturday, February 2, 2013

After Shots (Part 2)

Well, I never really got around to posting this second set of photos. Sorry about that!

I have a few other posts in the making, and I will try to get them out in a timely fashion. One is a report on our Boxing Day trip, one is about a new accessory for the bus, and one will be about our upcoming trip on March Break.

Ok, back to the bus. So, the last post we started at the front and made our way back. I'll try to pick up where I left off.

Remember this view from the front?


On the left we have the dinette. I have since added a black tablecloth here. It's quite cozy. We purchased two ottomans for storage. They also double as a seat on the end here for Toad. This folds down easy into a single bed.
 And on the right, my ABSOLUTELY favourite part of the bus! My kitchen. So nice and big, tons of counter space and everything I could possibly need (although we will probably cook most things outside).

Love this kitchen. Lots of oak cupboards, big fridge and freezer, stove, oven, microwave- what more could  I possibly need?

Just love this.
A nice shot of my ikea spice rack, rail and cutlery bucket.


 Alot of people ask us about what is under the "sink". This is the propane furnace, and it pumps the heat when the bus is not running. (When the bus is running we have vents like in a house, really warm!)


The propane furnace.      

The hall.

 The photo above shows the "hall". This is a really hard part of the bus to photograph. The fire extinguisher has been re-located. The armoires on the left have hanging space, and shelves, you can see a door on the right, that closes off the back of the bus (bathroom and bedroom). The door closed at the very back is to the bedroom. It is a very long bus!
Here is the bathroom with the forward door closed.
Another bathroom shot. There is a shower and a smallish tub.

Standing with the furthest door open, you see the bedroom, with a queen bed. On the left (behind the curtain) is the original bus bathroom, which is now a closet. On the right-- a very unique touch- a few of the original seats from the bus.

The bedroom.


 I haven't mentioned the curtains before, but this is a good shot of them. Although not exactly my style, they are all custom-- and have a track at the top and the bottom. The bus has most of its windows open, which makes for a really bright inside-- but the curtains are great for some privacy at night.


A weird bed shot. There are tables on either side of the bed with storage underneath. The bed is also on hinges, with tons of storage below.

More storage!

And finally, a look standing in front of the bed, all the way up to the front of the bus!


Well, I hope you enjoyed the tour, from front to back!!!


Saturday, December 22, 2012

"After" Shots (Part 1)


I had been working on a blog post when I realized that although I had posted the "Before" Photos, I failed to post the "After" Photos.

Please excuse the poor quality cell phone shots, but they will do.

Here is my little virtual tour of our bus. I will start with the things that I neglected to include the first time around. Then I will continue with a "front to back" tour of how the bus looks now.

This was the "questionable" mural on the back. I was NOT a fan. The seller kept telling us that "The Wizard" did it. I wanted to tell him just where the Wizard should go.


This is my view driving behind the bus. We got an Auto Trim place to design and put a "wrap" over the mural. It will be very durable, but we can take it off. I LOVE this. Same B we used for our monogram for our wedding stationery.
Many people are perplexed on how to get into the bus, as it has an airtight lock. Well, see this cool, unassuming button? Yep. Push it!

This is what you see when you open the door of the bus. On the left are two fire extinguishers, on the rights is a "stair light" so you can see when you step up. Notice the original stainless steel guiderails on either side. And a glimpse of the driver's seat.


The view when you get to the top of the stairs, looking back at the door. I just love the original features of this bus!

This is a bird's eye view of the driver's seat. It feels weird to sit here, so many different buttons that I just want to push.

Some of the buttons. I wanted to get a shot of the original "PA system" that would've been used when the bus was a passenger coach.
This shows the backup camera and some of the stereo system components, Also the cb!

Some other cool features- the door handle (yes, it actually swings!). And the original fan that works like defrost.
This is the passenger seat. I have my own little cupholder (just to the left). If I put the armrest up, Carson can sit with me too. A perfect view through the huge windshield.
View from the front, all the way to the very back.
Some pillow covers and a throw from Ikea. This couch is super comfy.

Across from the couch, I have two ottomans for toys and to use as side tables. You can pull it over to the couch or the chair. Flip over the top and its perfect for a footrest while you are on the couch, or an extra seat at the end of the dinette.
These are some technical things and gages. I know the top left is the generator. I have no idea about the other ones.


Well, that is all for now- we are HALF done all of the photos of the bus. Next post will have kitchen, bathroom and bedroom.

Thanks for reading!


Friday, December 7, 2012

The "Before" Shots

So, a few of our friends have had a chance to see the bus....mostly after some of my cosmetic/decor changes.

But, I thought it might be fun to do a Before and After. Consider this BEFORE- even if only a few things have changed, pretend to be amazed, ok?

Here are some of the original photos we received from the last owner before we went to look at the bus.


Leather couch that pulls out to a queen sized bed. So comfy. BEFORE

You can see the top of the passenger seat here, and the awning outside the window. This is the tv in the "living room". Notice the awesome oak cabinets and storage above!

One of the selling features of the bus- the huge kitchen! Lots of counter space. Propane elements, oven, range hood. Large fridge and freezer. Microwave. The cupboard under the sink is a propane furnace.

Bathroom. Good and basic. Remember this is a BEFORE photo.
Small (length and height) bathtub with shower.

 
Dinette with matching leather-like? material. Folds down to single bed.


Here is a view from the front to the back.


The hardest part to take a photo of. On the back left is the original bathroom, which still has the mirror (see flash!) and a tiled bench. The other owners had a portable a/c and heating unit. It really isn't necessary as the bus has 2 a/c/heat units overhead plus registers along the baseboards. Queen sized bed. In the background you can see dome of the original bus seats made into a sitting area.

Another hard one to capture. This is the head of the bed. The window opens here. Two glass topped tables and lots of storage. The bed is on a hinge so there is tons of storage below.


I didn't really get a picture of the "hall" that has wardrobes for storage. I also need to take some closeups of the drivers area as there are lots of cool things there.

I am working on "after" photos. Its pretty much all cosmetic-- a trip to Ikea fixed most things. Plus, we wanted to make it more personalized to us (in a big way!- more on that later).

Hope you enjoyed the quick tour. Will post more photos of my "after" soon. I will include some photos of the driver and passenger seats, I promise.

Tuesday, December 4, 2012

Our Bus

So, as mentioned, we bought a bus.

We looked at a few online. We went and saw ONE. We bought it!

Now, this is not to say that we are impulsive buyers. I like to think that we just know what we want, and we act on it.

Our bus was located in Beeton, Ontario. After about 1.5 hour drive, we were in awe of the beauty of the bus sitting in the owners driveway. It was somewhat majestic, so to speak.


What I loved: The shiny stainless steel, the classy (read: not tacky) paint, the sheer size. I really, really love the colours. Call me 80s crazy, but I love me some maroon and grey.

Unfortunately, the owner wanted to keep the lovely schooner pictured in the last photo. (Thank goodness).

The bus is a 1976 MCI. It was purchased in 1990 from Can-Ar coach by K.J Beamish. I had no idea who this was. However, he was a very prominent business man who has interest in Royel Paving and Germag Construction, as well as many other companies.

He commissioned the total reconstruction of the bus. It was always maintained and he insisted on all quality finishes. It really has good bones.

I'm working on interior photos!